No RMS templates are available in your organization
Problem:
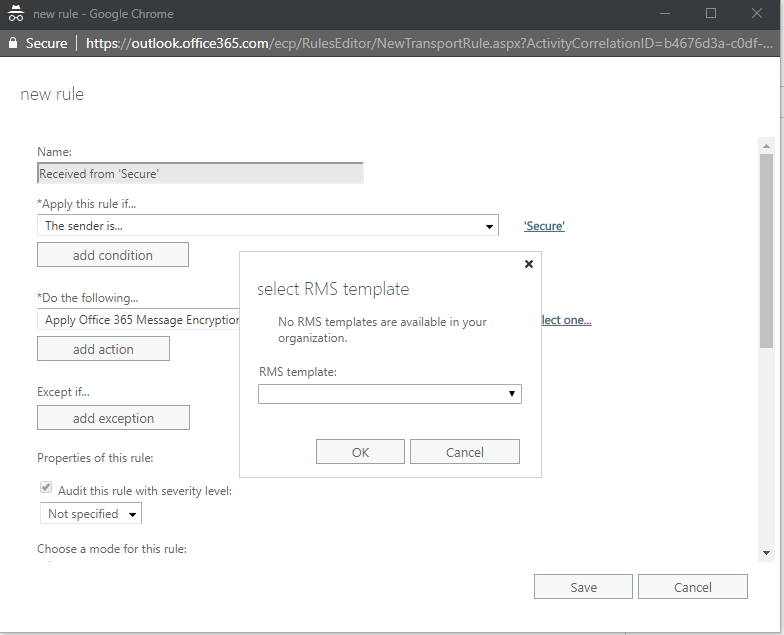
When configuring a transport rule for ‘Apply Office 365 Message Encryption and rights protection to the message with…” you receive the following error when attempting to select a label:
“No RMS templates are available in your organization”
Solution:
You need to configure Exchange Online for RMS. See below for powershell commands:
#Configure Credentials
$cred = Get-Credential
# Configure Exchange Online PS Session
$Session = New-PSSession -ConfigurationName Microsoft.Exchange -ConnectionUri https://ps.outlook.com/powershell/ -Credential $Cred -Authentication Basic –AllowRedirection
# Import Exchange Online PS Session
Import-PSSession $Session
# Configure the RMS Online Key Sharing Location (Note that this url changes based on location – See the bottom of this article for locations)
Set-IRMConfiguration –RMSOnlineKeySharingLocation “https://sp-rms.eu.aadrm.com/TenantManagement/ServicePartner.svc”
# Import the RMS Trusted Publishing Domain
Import-RMSTrustedPublishingDomain -RMSOnline -name “RMS Online”
# Test the IRM Configuration to ensure that Exchange is configured correctly
Test-IRMConfiguration -RMSOnline
The output of this command should look something like this, with the overall result as PASS.
Results : Checking organization context …
– PASS: Organization context checked; running as tenant administrator.
Loading IRM configuration …
– PASS: IRM configuration loaded successfully.
Checking RMS Online tenant prerequisites …
– PASS: RMS Online tenant prerequisites passed.
Checking RMS Online authentication certificate …
– PASS: The RMS Online authentication certificate is valid.
Checking that a Trusted Publishing Domain can be obtained from RMS Online …
– PASS: Trusted Publishing Domain successfully obtained from RMS Online. Templates available:
Confidential \ All Employees, Highly Confidential \ All Employees, Secure Email.
Checking that the Trusted Publishing Domain obtained from RMS Online is valid …
– PASS: Trusted Publishing Domain obtained from RMS Online is valid.
OVERALL RESULT: PASS
# Set the IRM Internal Licencing to True
Set-IRMConfiguration -InternalLicensingEnabled $true
Give Exchange Online 20 minutes to see the update and you should then be able to see the Templates.
Global policy issue:
Currently there is a bug with Exchange Online not being able to see labels that are NOT included in the ‘Global’ Azure Information Protection Policy. This is being investigated by Microsoft at the time of writing this article.
RMS Key Sharing Location URLs:
North America
https://sp-rms.na.aadrm.com/TenantManagement/ServicePartner.svc
European Union
https://sp-rms.eu.aadrm.com/TenantManagement/ServicePartner.svc
Asia
https://sp-rms.ap.aadrm.com/TenantManagement/ServicePartner.svc
South America
https://sp-rms.sa.aadrm.com/TenantManagement/ServicePartner.svc
Office 365 for Government (Government Community Cloud)
https://sp-rms.govus.aadrm.com/TenantManagement/ServicePartner.svc
[amazon_link asins=’1509304789,1509304797,B07DFPMXX9′ template=’ProductGrid’ store=’412294wp-21′ marketplace=’UK’ link_id=’cfcdc236-7528-11e8-809a-dfacb79ea481′]