HP Integrated Management Log Viewer location
The HP Integrated Management Log Viewer is usually installed in this locatoin:
“C:\Program Files\Compaq\Cpqimlv\cpqimlv.exe”
The HP Integrated Management Log Viewer is usually installed in this locatoin:
“C:\Program Files\Compaq\Cpqimlv\cpqimlv.exe”
Below is a list of useful Powershell commands that I use day to day – This list will be built upon over time:
Windows Server:
Get a list of running services:
Get-Service | Where-Object {$_.Status -eq "Running"}
Microsoft Exchange Server
Connect to Office 365 Exchange Online:
$UserCredential = Get-Credential

$Session = New-PSSession -ConfigurationName Microsoft.Exchange -ConnectionUri https://outlook.office365.com/powershell-liveid/ -Credential $UserCredential -Authentication Basic -AllowRedirection

Import-PSSession $Session
Get list of permissions on a users Mailbox Calendar:
get-MailboxFolderPermission -Identity [email protected]:\Calendar
Add a permission onto a users Mailbox Calendar:
Add-MailboxFolderPermission -Identity [email protected]:\calendar -User [email protected] -AccessRights Editor
Office 365 Administration
Connect to Office 365 via Powershell:
$UserCredential = Get-Credential

$Session = New-PSSession -ConfigurationName Microsoft.Exchange -ConnectionUri https://outlook.office365.com/powershell-liveid/ -Credential $UserCredential -Authentication Basic -AllowRedirection

Import-PSSession $Session

Connect-MsolService -Credential $UserCredential
Other Articles that may interest you:
Powershell Cmdlets to remember for the Microsoft 70-346: Managing Office 365 Identities and Requirements Exam
Powershell Cmdlets to remember for the Microsoft 70-347: Enabling Office 365 Services Exam
I had used AOMEI Server Edition to re-size the Partitions on a Windows 2008 R2 Server. Once the re-size was complete the server functioned as normal but the Window Server Backup stopped working.
I was getting Error Event 146 in the Backup Log with the message:
“A volume VOLUME_NAME included for backup is missing. This could be because the volume is dismounted, reformatted or disk is detached.”
For more information about this error see the TechNet Article here:
In my case I could not remove the Volume from Windows Server Backup. Attempting to modify the backup Schedule via the GUI gave me the error:
The filename, directory name, or volume label syntax is incorrect
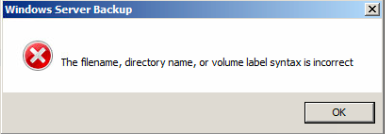
To resolve the issue I disabled Windows Backup via the GUI. I then re-setup the backup as normal with a single External Backup Drive. This retained my current backups and did not format the drive.
I then added the other drives into the Backup Schedule via the “wbadmin enable backup -addtarget” command. For more information on this command see here:
The backups then worked as they should.
Unable to add a new Windows Backup Destination to an existing Windows Backup Schedule via the Windows Backup mmc snap-in (Console).
Use wbadmin in an Elevated Command Prompt to add the new Destination Drive to the Backup Schedule.
Run the following command in an elevated command prompt to determine the Disk Identifier of the new disk:
wbadmin get disks
Based on the output, locate the disk that will be added to the scheduled backup. Make a note or copy the Disk Identifier (including the brackets). Be sure to copy the correct ID! If you don’t you could end up formatting another drive. The output will resemble the following:
Disk name: xxxxxxxxxxx
Disk number: x
Disk identifier: {xxxxxxxx-xxxx-xxxx-xxxx-xxxxxxxxxxxx}
Total space: xxx.xx GB
Used space : xxx.xx GB
Run the following command to add the new disk to the Scheduled backup. Use the Disk Identifier from the previous step as the “AddTarget” parameter.
wbadmin enable backup -addtarget:{xxxxxxxx-xxxx-xxxx-xxxx-xxxxxxxxxxxx}
When you receive the following prompt, type Y for Yes.
“Do you want to enable scheduled backups with the above settings?”
Once this has been completed, open up the Windows Server Backup Console and make sure that you can see the new.
The only irritating thing about adding a drive via this method is that it allocated a long name to the disk. It’t not really a problem, its just annoying if you have a number of backup drives labelled as ‘Backup 1’ ‘Backup 2’ etc and then you have a generated disk name that doesn’t suit.
Microsoft KB Article:
https://support.microsoft.com/en-us/help/2009365/error-message-when-you-try-to-add-an-additional-disk-to-a-scheduled-backup-the-filename,-directory-name,-or-volume-label-syntax-is-incorrect
Configuring a new NTP Server in Windows Server
Open an Elevated Command Prompt:
Query the current Time Service using:
w32tm /query /status
Run the following Command to configure a new NTP Peer:
w32tm /config /manualpeerlist:uk.pool.ntp.org
Restart the Windows Time Service:
net stop w32time
net start w32time
I recently had an issue with a Windows 10 PC. Windows Explorer stops responding when creating or renaming a folder on a Server 2012 Essentials R2 network share.
Client Spec:
Windows 10 64-Bit
Version 1607
Build 14393.351
4GB RAM
i5 Processor
When the user tries to create or rename a folder on a network share (UNC Path/Mapped Drive or IP Address), Windows explorer stops responding for about 30-60 seconds. Eventually the folder does get created or renamed. Viewing this from the server shows the old folder name until about 30-60 seconds later. No error is displayed client end other than the not responding of Windows Explorer.
For me the only resolution for this issue was to stop and disable the ‘Windows Search’ service on the server. As soon as the service is disabled the folders can be created and renamed without delay. Restarting the service caused the problem to come back immediately.
As far as I am aware, Microsoft has yet to create a patch for this issue.
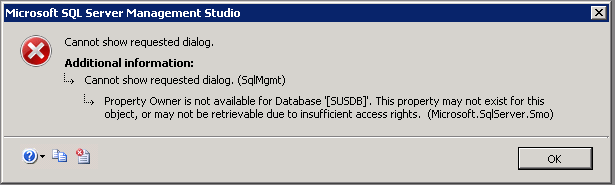
Unable to access the WSUS Database (SUSDB) from Microsoft SQL Management Studio.
When selecting properies on the SUSDB you get the below error message
Property Owner is not available for Database ‘[TEST]’. This property may not exist for this object, or may not be retrievable due to insufficient access rights.
Run Microsoft SQL Server Management Studio as Administrator
Connect to the WSUS SQL instance by putting the following into the servername: \\.\pipe\MSSQL$MICROSOFT##SSEE\sql\query
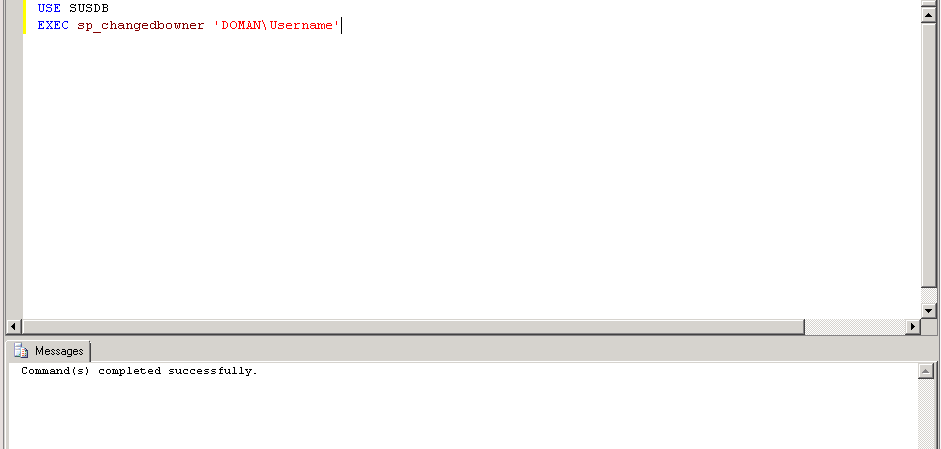
Create a new query and type the following:
USE SUSDB
EXEC sp_changedbowner ‘DOMAN\Username’
Obviously change the DOMAIN\Username to you’re own… Execute the query. You should get a message below the query (Output window) saying that it completed successfully.
USE SUSDB – This selects the Database SUSDB (The WSUS Database)
EXEC sp_changedbowner ‘DOMAN\Username’ – This changes the owner of the Database to your Admin account. Obviously replace the DOMAIN\USERNAME with your own details
Situation:
You have installed a new Server into an existing domain, or to replace an existing server. To save time you would like to export the DHCP Server Scope options and then import them into the new server.
Below is an easy way of migrating the DHCP Server settings with minimal effort. This will export all settings (Scope/Reservations etc).
Export Command on current server:
1) Open an Administrative Command Prompt
2) Use the following command to export the existing DHCP configuration:
“netsh dhcp server export dhcp.txt all”
3) Copy the dhcp.txt file to the new server
Import command on new server:
1) Open an Administrative Command Prompt
2) Use the following command to import the existing DHCP configuration:
“netsh dhcp server import dhcp.txt all”
Hopefully this has been useful to you.

I’ve written the below article as an overview on how to Free up disk space in SBS2008 and SBS2011.
Reclaiming Disk Space in SBS 2008 / SBS 2011.
The IIS Logs:
IIS logs in SBS 2008/2011 can grow pretty big. Check the following folder and sub directories:
C:\inetpub\logs\LogFiles
Delete the *.log files but do NOT delete the actual folders:
Top TIP:
Unless there is no other option, leave the last one month of logs so that they can be reviewed if ever required. They can always be moved to another volume if you don’t won’t to delete them.
The Windows Small Business Server logs folder:
Windows SBS generates a number of log files when utilising the SBS Console. These logs can become very large over time.
The SBS Log files can be found here:
C:\Program Files\Windows Small Business Server\Logs\
These logs can be moved or deleted if required to free up additional disk space. I’d always suggest moving a log file opposed to deleting it.
Console.log –
Console.log can become particularly big in some instances if you use the SBS Console. This log will continue to grow while the SBS Console is running and as you use the SBS wizards. The Windows SBS Manager service will need to be stopped in order to delete this log. The SBS Console will also need to be closed. Once the log has been moved/deleted, remember to restart the Windows SBS Manager Service.
Top TIP:
When using the SBS Console, make sure that it is closed afterwards. The console.exe process can sap server resources.
*.evtx files –
These are the event logs before the setup of the server completed, they can be safely removed if the server has been in production and had no setup issues.
W3wp.log –
Located in the C:\Program Files\Windows Small Business Server\Logs\WebWorkplace folder. This is the log for Remote Web Workplace (RWA).
MonitoringServiceLogs –
The C:\Program Files\Windows Small Business Server\Logs\MonitoringServiceLogs folder.
These are the logs for the Windows SBS Manager service. As such the service will need to be stopped prior to the logs deletion.
POP Connector Logs –
The POP3 connector log located in C:\Program Files\Windows Small Business Server\Logs\POP3Connector monitors the POP3 Service and keeps a log of the connections made to the POP Server. This log is typically only large if the POP Connector is being used. You will need to stop the Windows SBS POP3 Connector Service in order to delete these logs.
POP Connector Badmail –
If you the POP3 Connector is being used, you may end up with emails that failed to be delivered (rejected by the local Exchange server) in C:\Program Files\Windows Small Business Server\Data\badmail.
WSUS Cleanup Wizard:
Windows SBS 2008/2011 comes with Windows Server Update Services (WSUS) pre-installed. The database and content for this feature can grow massively over time. To help reduce this space, you can run the WSUS Cleanup Wizard:
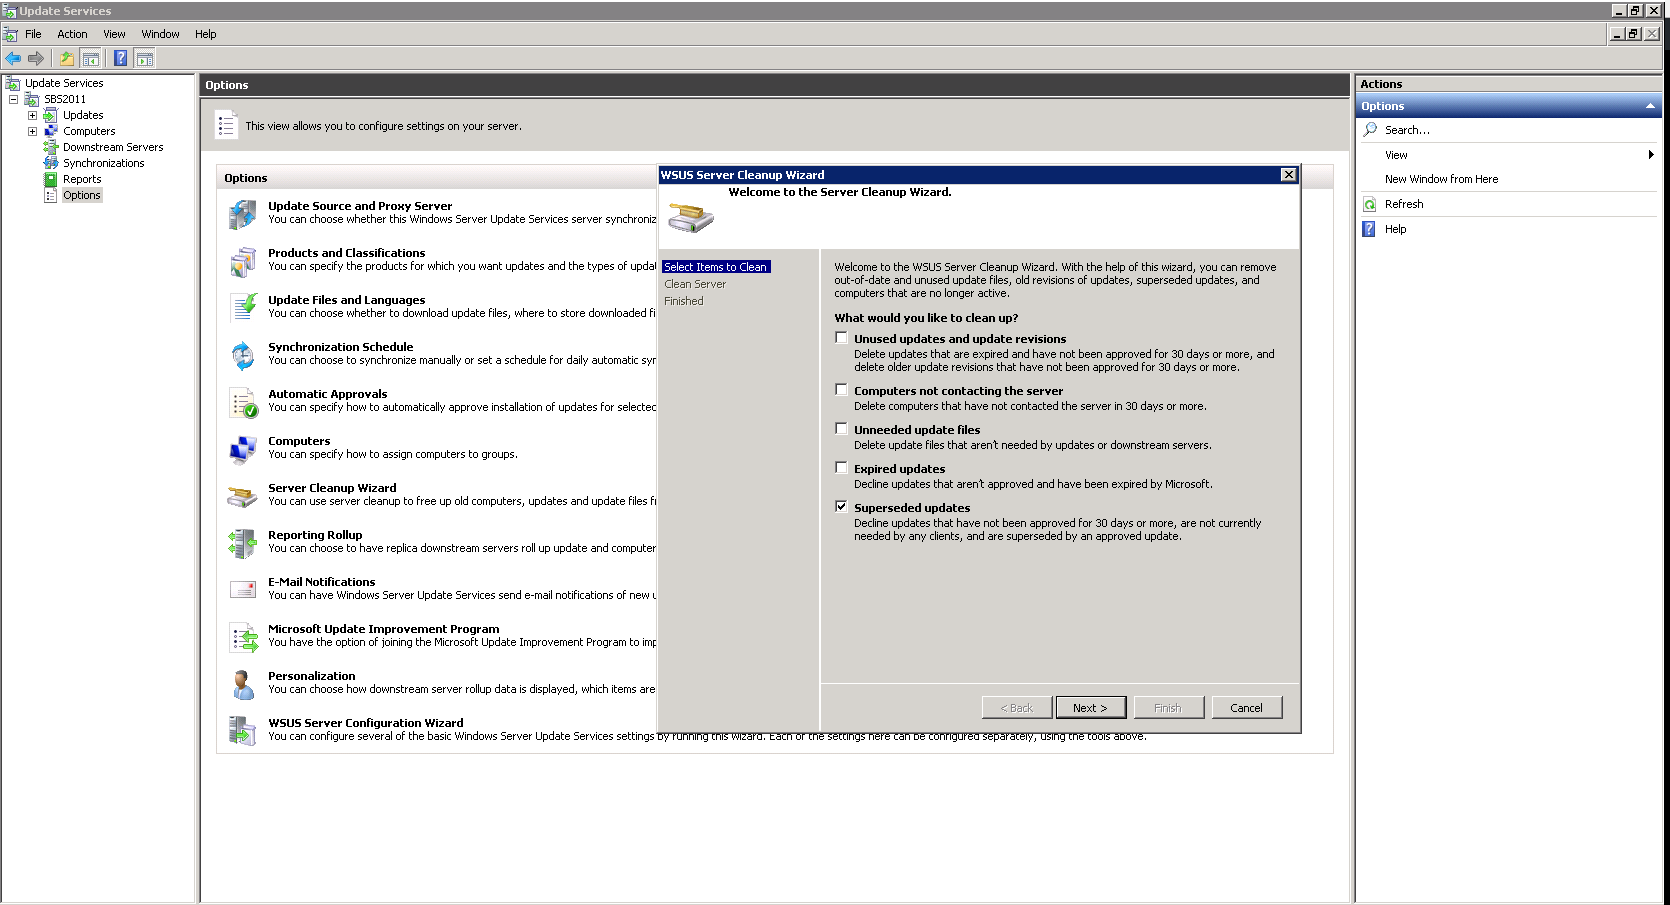
To run the Server Cleanup Wizard :
1. Click Start>Administrative Tools> Windows Server Update Services
2. The WSUS Administration Console will open > Expand the server name> Select Options, and then Server Cleanup Wizard.
3. Select one option at a time and click next.
4. The wizard will begin the cleanup process and will present a summary when it has completed. Click Finish to complete the process.
5. Repeat steps 2-4 until you’ve gone through all the cleaned up options.
Note:
If the cleanup wizard has not been run in a while (or ever) it can take several attempts for the wizard to succeed. The wizard can crash so don’t be alarmed if you’re given an error. If the wizard crashes and you’re unable to open the WSUS Console then restart the following services and try again:
Windows Update / Windows Internal Database.
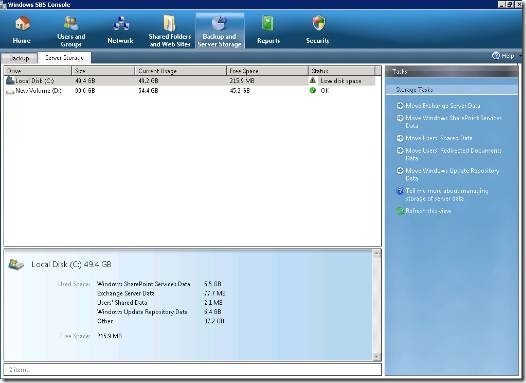
The SBS Move Data Wizards:
The SBS Console comes with a number of Wizards that allows the admin to move certain files and folders to other partitions. It is suggested that a good backup always be taken prior to the wizards being run. The Wizards can be accessed from the SBS Console> Backup and Server Storage> Server Storage. See the wizards on the right hand side.
– Move Exchange Server Data:
This moves both the exchange database file as well as your exchange transaction logs for all storage groups.
– Move Windows SharePoint Services Data:
This moves the SharePoint Content and Configuration databases.
– Move Users’ Shared Data:
This moves C:\Users\Shares\ directory and all sub directories
– Move Users’ Redirected Documents Data:
This moves C:\Users\FolderRedirections\ directory and all sub directories
– Move Windows Update Repository Data:
This moves the Windows Update repository data from C:\WSUS\WSUSContent and C:\WSUS\UpdateServicePackages. Please note it does NOT move the actual WSUS Database (SUSDB).
Move Wizards location:
Moving the WSUS Database:
The Windows Server Update Services Database can be relocated by doing the below. Again a good backup is recommended prior to proceeding:
– Launch SQL Server Management Studio Express console as an administrator. It is located under Start > Programs >Microsoft SQL Server 2008 R2 > SQL Server Management Studio Express.
– Fill in the following information and then click Connect
– Server type: Database Engine
– Servername: \\.\pipe\MSSQL$MICROSOFT##SSEE\sql\query
– Authentication: Windows Authentication
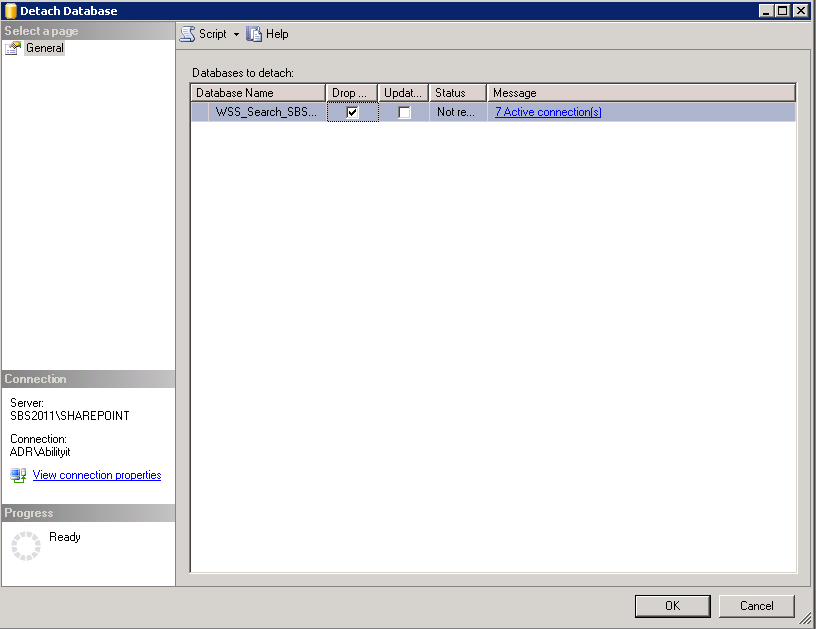
– Expand Databases and right-click on SUSDB and select Tasks > Detach… from the context menu.
– Select the “Drop Connection” checkbox and click OK.
– Open Windows explorer and COPY the C:\WSUS\SUSDB folder to the new location on another partition.
– To reattach the database, right-click on Database and select Attach… from the context menu.
– On the Attach Databases page select the Add button.
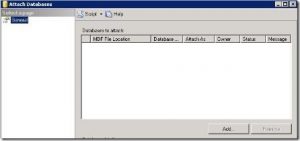
– Browse to the new location of the SUSDB.mdf database and select OK twice to complete the move
– Delete the old Database folder once you’re happy that it is working correctly.
Still running low on disk space?
Download and install TreeSize Free (http://www.jam-software.com/freeware/)
Run a scan on the drive and it will display all the folders on that drive as well as their file sizes. You can then see where the largest folders are and determine what else is taking up space.
I’ve previously came across a problem with integrating the Windows Server Essentials 2012 Dashboard with Office 365. I’m posting the problem and solution here as it has helped some other users on a few forums.
When running the Office 365 integration wizard in the Windows Server 2012 R2 Essentials dashboard the wizard runs for a very long time, and returns the following error:
“An unknown error occurred. Make sure that the computer is connected to the internet, and the try again. If you continue to to experience, restart the server and then try again”
After checking through the log files (C:\ProgramData\Microsoft\Windows Server\Logs\SharedServiceHost-EmailProviderServiceConfig.log) I found the following:
Microsoft.WindowsServerSolutions.O365Integration.O365ConfigureException: The remote server returned an error: (404) Not Found. —> System.Net.WebException: The remote server returned an error: (404) Not Found.
at System.Net.WebClient.DownloadFile(Uri address, String fileName)
at Microsoft.WindowsServerSolutions.O365Integration.SharePointManagementUtils.InstallCSOM()
I resolved the error by installing the ‘SharePoint Server 2013 Client Components SDK‘ which contains the CSOM modules. See here:
http://www.microsoft.com/en-gb/download/details.aspx?id=35585
Once this had been installed the Integration wizard worked correctly.
Hope that this helps.